You search for “Flutter app development” on the internet and get ready to run into abundant options!
But the two major aspects that are gaining significant traction are “Visual Studio Code (VS) Code and Android Studio!
Comparing these two IDEs (Integrated Development Environments) for Flutter app development is incredibly important!
Though both these IDEs are efficient, they still differ from each other.
Without further ado, let’s understand both frameworks in detail to build a solid Flutter mobile app!
Let’s dive in!
| Table Of Contents: 1. What is Visual Studio Code? 2. What is Android Studio? 3. How to Use Android Studio? 4. Which is Better: Visual Studio Code vs Android Studio? Conclusion |
What is Visual Studio Code?
Visual Studio Code, or VS Code, is a text editor that lets developers create a customized development environment using plugins. It is lightweight and easy to install on any platform.
VS Code supports Node.js, TypeScript, and JavaScript right out of the box. It also has many extensions for different programming languages like C++, Java, C#, PHP, Go, and Python.
VS Code competes with other text editors like Atom, Sublime Text, and TextWrangler, but it offers better and more powerful features.
Before you begin to build a Flutter app, you should first install the Visual Studio Code.
- All you have to do is simply go to the Visual Studio Code Website to download the latest version of Visual Studio Code.
- Once it’s successfully downloaded, you may then need to install it. Make sure you find the file in “File Manager”. If you are a Windows user, click on the “.exe file” while Mac users need to click on the “.zip” file.
- Make sure you have your Visual Studio Code application saved in a place you know that you can easily find out!
Now that you have got an idea of installing Visual Studio Code, it’s time to make a project.
#1. In the first step, you will be required to create a development folder. Make sure you remember it, so it’s wise to create a new folder called “Projects”.
Then, inside the same folder, you will need to create a new folder called “HelloWorld”.
#2. Then, you may need to open your Visual Studio code. Then, click on the “Explorer” icon on the left-hand menu and after that, click on the “Open Folder” button and then choose your development folder.
#3. In the next step, in the Visual Studio Code’s Explorer Pane, you may need to click on your development folder’s name. Then, you will see four icons appear to the right of the folder name. Click on the “New File” icon.
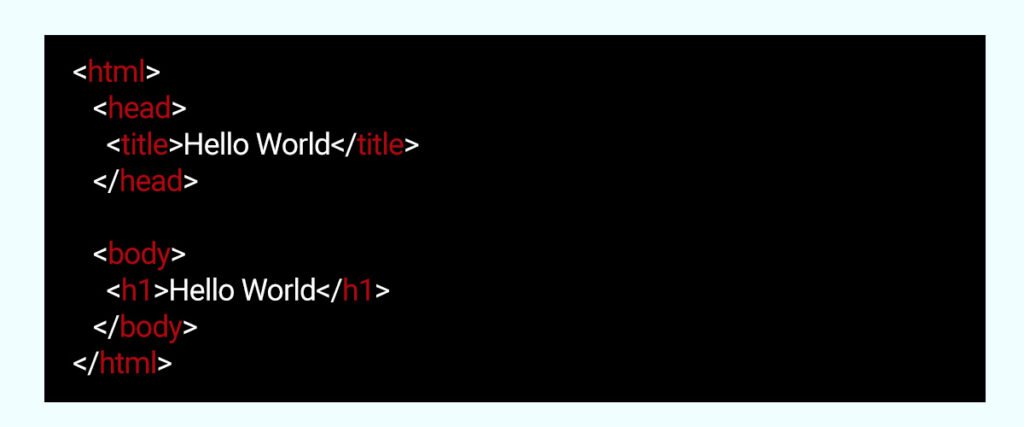
#4. Then, you are required to copy the following HTML code and then only you can easily save your file with the “Auto-Save” feature.

Next, What is Android Studio?
To put it simply, Android Studio is the official Integrated Development Environment (IDE) for building dedicated Android app development. Furthermore, it is a robust tool that enables developers to build high-quality, responsive, and performance-driven Android apps for the Android platform to tap the Android fanbase which is more than 3 billion.
Just like we’ve discussed the use of Visual Code Studio, let’s throw some light on the steps to use Android Studio.
How to Use Android Studio?
Here’s a list of the detailed steps to download Android Studio and configure your first app project.
Step 1: Download Android Studio
To set up Android Studio, you first need to download the IDE from the official Android Studio download page. Be sure to select the version that is compatible with your operating system, and then download the installer. Once you have finished downloading, you may need to run the installer and follow the on-screen instructions to get things started.
Step 2: Install the Required Components
During the installation process of Android Studio, you will receive prompts to install several essential components required for developing Android applications. These components include the Android Software Development Kit (SDK), the Android Virtual Device (AVD) Manager, and the Android Emulator.
The Android SDK is a comprehensive collection of development tools and libraries that provide the necessary resources for building, testing, and debugging apps. The AVD Manager allows you to create and manage virtual devices that simulate various Android devices on which you can run and test your applications.
Finally, the Android Emulator is a powerful tool that enables you to run and test your applications in an environment that mimics a real Android device.
Step 3: Configure Android Studio
It’s configuration time! When you launch Android Studio for the first time, you will be prompted to configure the IDE. Choose the “Standard” configuration and click on “Next”. After that, you are required to select the theme of the IDE and then click on “Next” again. Furthermore, you have the option to customize the settings as per your goals.
Step 4: Create a New Project
Once you have configured Android Studio, you can begin creating your first Android application. To start a new project, click on “Start a new Android Studio project” on the welcome screen, or select “New Project” from the File menu. You will then be prompted to enter the project name, package name, and other details related to the project.
Step 5: Build Your Application
After creating your project, you can begin developing your application using the numerous tools and features available in Android Studio. You can use the visual layout editor to design the user interface, write code in Java or Kotlin, and utilize the Android SDK to access device features such as the camera, sensors, and GPS.
Step 6: Test Your Application
Testing your application is a crucial step in the development process. To test your app, use the “Run” button in Android Studio to launch it on either the emulator or an actual device. Additionally, you can utilize the built-in profiler to analyze your application’s performance and identify any bottlenecks or issues.
{Also Read: Android Studio Embraces Gemini: How This Update Supercharges Mobile App Development?}
Which is Better: Visual Studio Code vs Android Studio?
There’s a variety of functionality differences between these two tools- Visual Studio Code and Android Studio. Speaking of the differences, Visual Studio Code is lighter which means if you are running short on proper hardware, it could be an ideal choice over “Android Studio” But, on the other hand, Android Studio provides seamless integration with the Android build system and even comes with an integrated interface to provide a dedicated layout for multiple Android development tasks.
Conclusion
There’s no one-size-fits-all kind of answer to be given for Android App development! If you want to build an Android app for your business, make sure you understand your business requirements and then choose the right option. On the other hand, if you don’t have time and don’t want to run into complexities, hiring a dedicated Android app development company like EitBiz may help you out!
To learn more, simply visit EitBiz or you can even drop us an email at info@eitbiz.com to discuss your Android app development needs today!


